What and why Arduino? "Hello, World!" with Arduino Uno
- Aug 24, 2021
- 6 min read
Updated: Mar 6, 2022
Arduino is an open-source electronics platform based on easy-to-use hardware and software. The name "Arduino" comes from a bar in Ivera, Italy. It works at 3.3v - 5v and is small in size making it easy for developers to integrate with almost anything. Let's go ahead and tinker with Arduino 🚀.

Arduino is one of the best geeky hobbies you can learn because it involves a little bit of everything: circuits, coding, do-it-yourself, problem solving, creativity, etc. But even if you have no experience with any of that, you should still learn Arduino -- even if just the basics.
But what is Arduino? Why such a weird name? What can you do with it? Is it a good match for you? If so, what's the best way to get started? We cover all of that, and more, in this post.
What is Arduino❓
In technical terms, an Arduino is a single-board microcontroller that is capable of reading inputs -- light on a sensor, user input, button, or any wireless input - turning it into an output - turning on lights, activating a motor, publishing something online, or as another input.
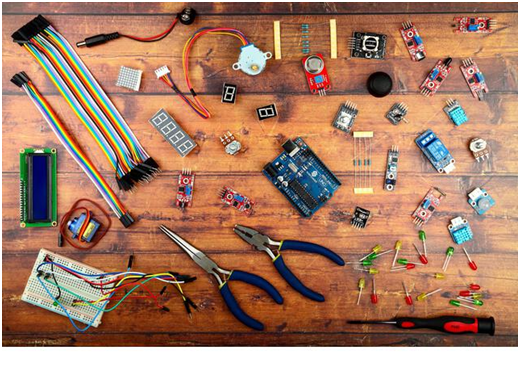
But in layman's terms? A credit card-sized circuit board with input and output pins that can hook up various other electronic components using wires, resistors, LEDs, motors, fans, buttons, speakers, sensors, and more! The Arduino board is the brain, and you can mix and match the various components however you want to create whatever you want, and then program the board to produce outputs based on inputs (e.g. press a button to turn on a motor).
Arduino has a worldwide community of makers - students, hobbyists, artists, programmers, and professionals - who constantly add a lot of publicly accessible knowledge, do projects based on Arduino that can help any level of learners acquire this skill and get doubts cleared easily and find something that you can work with.
Who invented Arduino?
Arduino was created in 2005 by Hernando Barragán (creator of Wiring), Massimo Banzi, and David Cuartielles at Ivrea Interaction Design Institute, Italy. The name ‘Arduino’ comes from a bar, de Ri Arduino of Ivrea, where some of the founders used to meet.
Back in 2003, students at the Interaction Design Institute Ivrea in Italy used something called a BASIC Stamp microcontroller as part of their electronics studies. Unfortunately, it was a pricey bit of equipment (about $100 at the time), which led to the creation of Wiring by Hernando Barragan which was forked in a separate direction and called Arduino.
Why Arduino? 🤔
Inexpensive - Arduino boards are relatively inexpensive compared to other microcontroller platforms.
Cross-platform - Arduino software IDE runs on Windows, Linux, and Macintosh OSX operating systems, unlike most other microcontrollers that are restricted to Windows OS.
Simple programming environment - Arduino software IDE is easy-to-use for beginners yet flexible enough for advanced users to take advantage of as well.
Open-source and extensible - The plans of the Arduino boards are published under a Creative Commons license, so any experienced circuit designers can make their own version of the module, extending it and improving it. Also, the Arduino software is published as an open-source tool, available for extension by experienced programmers.

Hardware - Arduino Uno 🧰
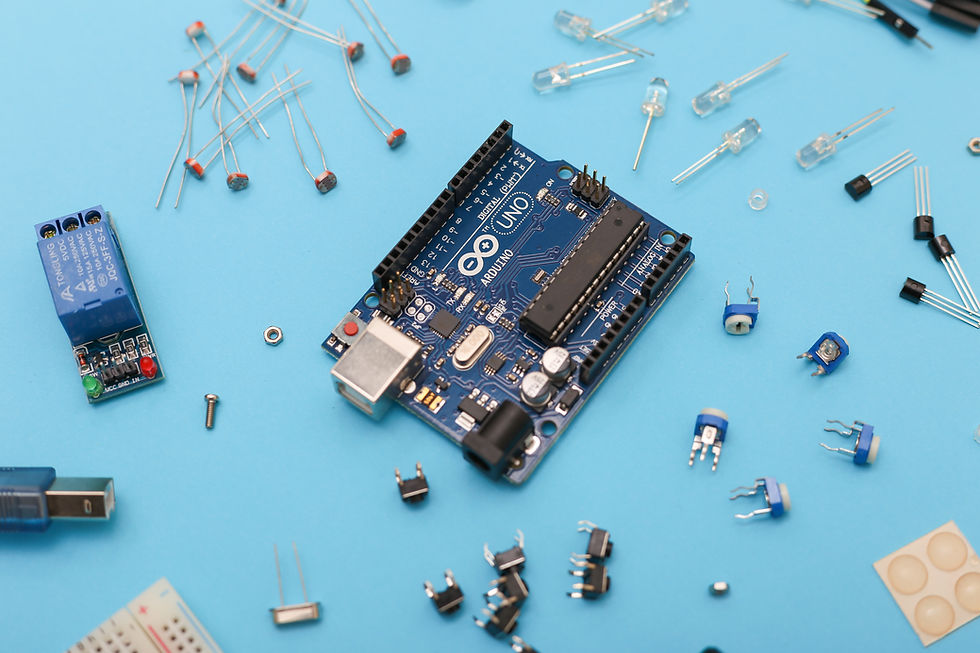
Arduino Uno (‘Uno’ is Italian for One) is the best board for beginners as it has got everything that you need to get started on your journey of exploring electronics. It uses an ATMEGA328p microcontroller.

Curious to find more about ATMEGA328p? Check this out.
The board contains everything needed to support the microcontroller; simply connect it to a computer with a USB cable or power it with an AC-to-DC adapter or battery to get started. You can tinker with your UNO without worrying too much about doing something wrong, in the worst-case scenario 🧯 you can replace the chip for a few bucks and start over again. If you are still worried about damaging your board, you can use simulation software, like TinkerCAD, to check your circuit and program and then write it to your physical board.

Software 👩💻
The Arduino Integrated Development Environment (IDE) is a cross-platform application (for Windows, macOS, Linux) used to write and upload programs to Arduino compatible boards, and can be used for other vendor development boards as well. It includes a code editor, a compiler, and an uploader. Code libraries for using peripherals, such as serial ports and various types of displays are also included. Arduino programs are called “sketches” written in a language very similar to C or C++.
There are other simulation software available to simulate a virtual Arduino in case the board is not available. TinkerCAD is one such online simulator software best suited to simulate Arduino Uno.
Setting up Arduino IDE
First, download the Arduino IDE software from the Arduino website.
Then, install it on your PC.
Once you run the ‘.exe’ file and open the application, you’ll see the following layout.

The IDE can be used to write and upload programs to your Arduino board. But what to do if you do not have a board? 🤔
Well, don’t worry as TinkerCAD has come to our rescue 🚀.
Setting up TInkerCAD
Go to the TinkerCAD website.
Click on ‘Join Now’ at the top right corner and create an account.
And that’s it!✅ You can now Tinker with circuits, create new circuits, and many more.
Hello, World! - Arduino Uno 💡
Let’s make our first project to test our setup and also to understand how to use them. The “Hello, World!” of Arduino is making an LED blink. So let’s get started! 🚀
TinkerCAD
After signing up and logging in, go to your dashboard and choose circuits in the list on the left of your screen.
Click on ‘create new circuit’ to make a new circuit 🛠.
On the right side, a list of components will be available. Search for ‘Arduino Uno’ in that search bar to find the ‘Arduino Uno R3’ board.

Drag (click mouse-left and hold) and drop in the white open area.
Arduino Uno has a built-in LED so let us use that for our blinking project.
Go to the ‘code’ tab from the tabs available to the top right and click on it.
Change the edit mode from blocks to text.

A default code will be available (if not, type in as shown) (NOTE: Pin ‘13’ links to the built-in LED. You can replace ‘13’ with ‘LED_BUILTIN’, which is the default name for built-in LED, everywhere in the code).

Now click on ‘start simulation’ available beside the ‘code’ tab and voilà ✨ the built-in LED starts blinking 😲.

But what exactly happened? How did the LED start blinking? Let’s find out 🕵️♀️
Every Arduino program has two basic blocks, the setup() block and the loop() block.
The setup() block contains code that is executed first and just once. It usually has code to set the pins to input mode or output mode.
void setup()
{
	  pinMode(13, output);
}
The pinMode() function is a built-in function used to define a pin (analog or digital) as an input pin or output pin.
Syntax: pinMode(pin, mode);
Note that all lines end with a semi-colon (;).
The built-in LED is, by default, defined with the name ‘LED_BUILTIN’. As we need the led to blink, we need to set it to output mode (as blinking is an output, user-visible action) with the help of the pinMode() function.
The loop() block runs forever as long as the board is supplied with power so this block contains the code that needs to run forever (usually, most of the code is written in this block).
void loop()
{
  digitalWrite(13, HIGH);
  delay(1000); // Wait for 1000 millisecond(s)
  digitalWrite(13, LOW);
  delay(1000); // Wait for 1000 millisecond(s)
}
delay() is a built-in function that pauses the execution for the specified amount of time (specified in milliseconds).
digitalWrite() is also a built-in function that gives 1’s and 0’s to the specified pins.
Syntax: digitalWrite(pin, HIGH/LOW);
Now, we need our LED to blink i.e., it should TURN-ON, stay in that state for a while, and the TURN-OFF. And this should repeat until we disconnect the power supply. So, how can we do that? 🤔
We know that our digitalWrite() function sends HIGH (1) or LOW (0) to a specified pin. So, we can use this to turn on the LED with digitalWrite(LED_BUILTIN, HIGH) and turn it off with digitalWrite(LED_BUILTIN, LOW).
These two lines will turn the LED on and immediately turn it off but this isn’t what we want. We want it to stay in that state for some time and then change.
We can do so using our delay() function. We can specify a second delay after each statement with delay(1000).
Putting all of this together, we get out LED blinking code.
Hooray! 🎉 We wrote our first code to dictate our board to blink its LED.
If you have the hardware, do not stop and proceed with building with Arduino IDE.
If you have the hardware, do not stop with this, build it with Arduino IDE.
Arduino IDE
Open your Arduino IDE.
Write the same code as in TinkerCAD or goto File > Examples > 01. Basics and select ‘Blink’ to load the code.

Now go to Tools and select the “Arduino Uno” board.

Connect your Arduino board to your system with the USB cable.
Now click on the → symbol at the top to upload the code to your board and voilà ✨ the built-in LED starts blinking and this time, you know why 😏.

Go ahead and explore 🔎 the examples provided in Arduino IDE and tinker with them. Even if you do not have the board, check out the examples in Arduino IDE and simulate them online with TinkerCAD 🚀.
Check your understanding with this quiz.
Follow us on Instagram for updates, event announcements, and regular quizzes to check your understanding.


Comments